
Last Fall I took a class locally to create some soy wax batik fabrics. It was great fun and I came out with a number of beautiful, usable fabric pieces. I thought I would share them with you. The class was a full day class taught by In Good Company of Hamilton, Montana. They provided a whole lineup of colors of Setacolor paint for us to use (they said Dynaflow and of course Procion Dyes will work as well) and piles of tools for mark making on fabric. We used electric skillets/fry pans to melt the soy wax and put our pieces outside in the parking lot to dry after waxing, adding color to them, waxing again, and adding more color.
I cut my PFD (prepared for dyeing) fabric into fat quarters and fat eighths. The pieces can be colored with a base color or you can just start applying the wax. The wax needs to penetrate the fabric rather than just sitting on top so make sure the wax is warm enough. Let the fabric/wax dry. Spritz the fabric with water to moisten it before adding the color with a foam brush. Apply lighter colors first and be aware of how colors will mix and blend when they touch each other on the fabric. Additional layers of wax can be applied, dried, and more color applied to create interesting layering of color and pattern. Know when to stop!
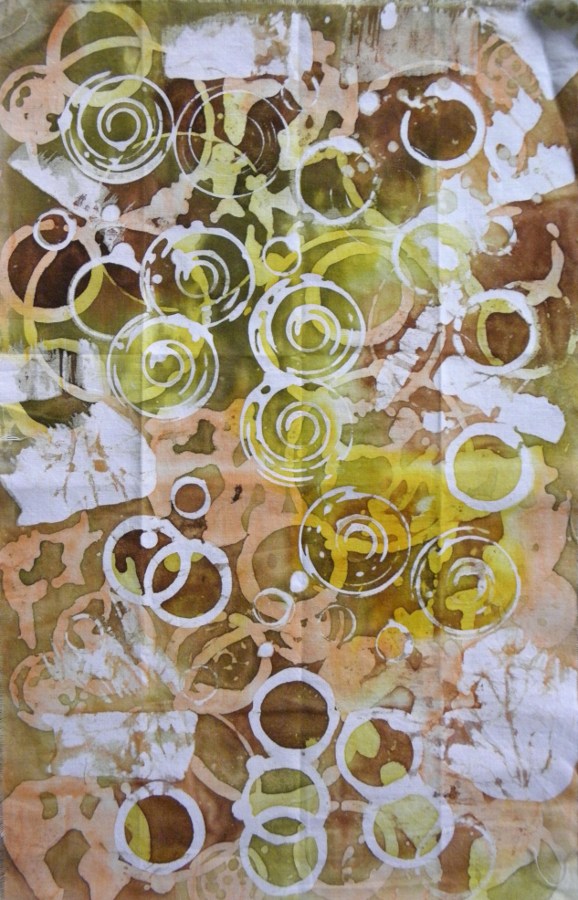
Here are two detail images and then the full piece of fabric:


The circles on the left were made with the back side of a round foam stamp and then I bunched up the fabric with the dried wax on it and added the color which seeped into some of the cracks.


This piece was done with a comb---over and over and over and over.....! It took a lot of time, but when I saw the interesting little teardrop-like shapes the teeth of the comb were making I was motivated to do the whole piece of fabric. Tedious, but worth it!

The "plaid" was done with a wide foam brush that had notches cut out of it. The spirals were made with a coiled wire tool that might have been a whisk and then other circles were made with various circular items of different sizes.

After I got home I proceeded to iron the fabrics between layers of brown grocery bags, then boiled and then washed my fabrics to remove any remaining wax. They retained the color pretty well and are fairly soft so I think I got most of the wax out. They say that the soy wax will not harm your plumbing---I hope that is true!
The advantage of taking the class instead of doing this at home was the virtual rainbow of colors we had to choose from, and seeing what was working or not working for the other participants. We used anything from whisks and potato mashers to foam stamps and intricate metal batik stamps. Many of the mark making tools created surprising results and creating the layers of design and interest was very fun.
Try it---you'll like it!!


No comments:
Post a Comment