Tuesday, February 28, 2012

More Soy Wax Batik Fabrics

Here are some more images of the soy wax batik fabrics I created in a class last fall.


Square yellow image on this one is the bottom of a plastic berry basket.


I cannot for the life of me remember how I made the little white marks on the piece above!

The one below used the same wide foam brush with notches cut out as one of the fabrics on my previous soy wax batik post. This piece has three layers of color/wax which creates some depth in the imagery.

Below is a quilt that I made using some of the batik. The white sweeps were made using a wide paint brush to apply the soy wax in a random, freeform pattern. Here is a pic of the remaining piece of that fabric:


"Midas Touch"

I hope you have been inspired and will try this technique. I am looking forward to using my fabrics this coming year and creating some fiber art that uses my own fabric designs!

Sunday, February 26, 2012

Cord Dyeing


A recent project for our textile arts group was using dye cords (Tie Dye Color Cords) to color PFD fabric. The cords are impregnated with dye powder so they are easy to use and less messy than mixing powdered dye. They create interesting designs and are quite versatile and the color is quite vivid. I really enjoy working with this product and will likely do it again. I love using shibori techniques on fabric and the dye cords work well for this.

The green and pink piece was diagonal pleated with cords in between some folds and some cord wrapped around the folded edge which created the X's.

The orange piece above was heavily hand stitched all over and then the threads were gathered tightly and tied together to hold the random pleating. Nice color, but not sure the stitching was worth all the time it took!


This next piece was done in a fairly traditional tie-dye pattern where the fabric is scrunched in a circular way and instead of the traditional rubber-banding it is tied with a dye cord. I also pushed in the top of the little bunches and inserted a small piece of dye cord into that indentation. I love the shapes, halos and random color patterns of this piece.


It is so much fun unfolding the fabric and seeing what the dye cords have done and how the colors blend and spread. This is a fairly easy project with a great surface design result. I believe you can get the dye cords through Dharma. The ones we used are made by Consolidated Thread Mills, Inc. The package says they will dye cotton or rayon fabrics and a package has 6 colors in it. Fun Stuff!

Friday, February 24, 2012

Soy Wax Batik


Last Fall I took a class locally to create some soy wax batik fabrics. It was great fun and I came out with a number of beautiful, usable fabric pieces. I thought I would share them with you. The class was a full day class taught by In Good Company of Hamilton, Montana. They provided a whole lineup of colors of Setacolor paint for us to use (they said Dynaflow and of course Procion Dyes will work as well) and piles of tools for mark making on fabric. We used electric skillets/fry pans to melt the soy wax and put our pieces outside in the parking lot to dry after waxing, adding color to them, waxing again, and adding more color.

I cut my PFD (prepared for dyeing) fabric into fat quarters and fat eighths. The pieces can be colored with a base color or you can just start applying the wax. The wax needs to penetrate the fabric rather than just sitting on top so make sure the wax is warm enough. Let the fabric/wax dry. Spritz the fabric with water to moisten it before adding the color with a foam brush. Apply lighter colors first and be aware of how colors will mix and blend when they touch each other on the fabric. Additional layers of wax can be applied, dried, and more color applied to create interesting layering of color and pattern. Know when to stop!


Here are two detail images and then the full piece of fabric:


The circles on the left were made with the back side of a round foam stamp and then I bunched up the fabric with the dried wax on it and added the color which seeped into some of the cracks.


This piece was done with a comb---over and over and over and over.....! It took a lot of time, but when I saw the interesting little teardrop-like shapes the teeth of the comb were making I was motivated to do the whole piece of fabric. Tedious, but worth it!

The "plaid" was done with a wide foam brush that had notches cut out of it. The spirals were made with a coiled wire tool that might have been a whisk and then other circles were made with various circular items of different sizes.


After I got home I proceeded to iron the fabrics between layers of brown grocery bags, then boiled and then washed my fabrics to remove any remaining wax. They retained the color pretty well and are fairly soft so I think I got most of the wax out. They say that the soy wax will not harm your plumbing---I hope that is true!

The advantage of taking the class instead of doing this at home was the virtual rainbow of colors we had to choose from, and seeing what was working or not working for the other participants. We used anything from whisks and potato mashers to foam stamps and intricate metal batik stamps. Many of the mark making tools created surprising results and creating the layers of design and interest was very fun.


Try it---you'll like it!!

Tuesday, February 21, 2012

Time to Create More Art

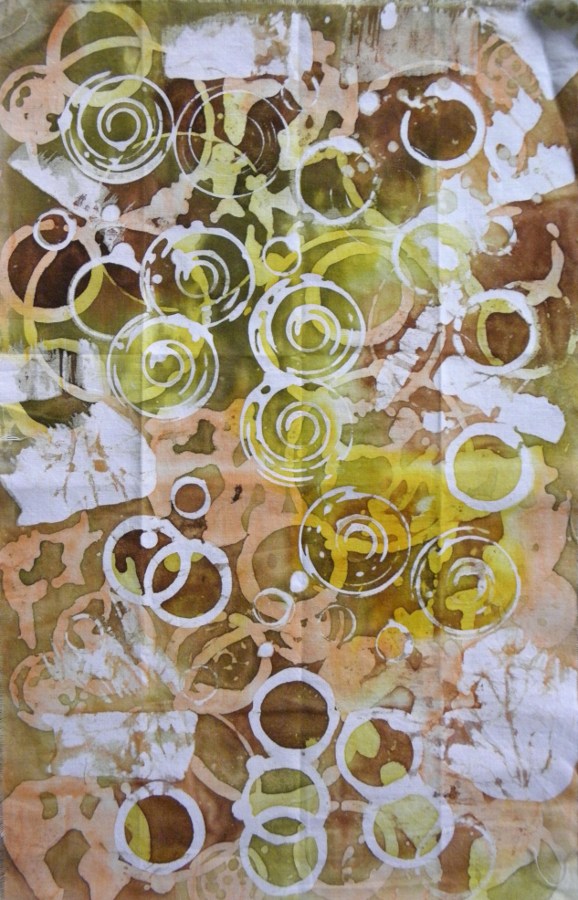
For the past five years I have been attending monthly creative sessions at a small business in Hamilton, Montana called In Good Company. This business is comprised of four women fiber artists who began their business making and selling hand-dyed fabric and silk ribbon. Then they began offering monthly "TARTS" classes---short for textile arts. Each month we get a small packet of supplies and materials for completing a surface design project of some sort. We take it home, play with it, make something, and bring it the next month to "show and tell" and talk about what we liked and didn't like about the products, process, results, etc.

Not only are these classes educational and the packets creatively stimulating, the gathering of like minded individuals has been an invaluable experience. The shop also sells many of the products, supplies, and literature related to the techniques we experiment with.

Today we were told that these women are planning to end this creative union as of this coming June. Although not totally surprised, I was disappointed. I have used these classes as way to jump start my creativity, expand my knowledge, and try out products and techniques that I might not have attempted on my own without some sort of guidance and having sometimes unique products provided to me in small "trial" size quantities.

I totally understand the decision In Good Company has made and wish them all the best in whatever they do with their creative lives, but we will miss them as an entity and a driving force for art quilting in the Bitterroot/Missoula area.

It is their hope, and mine, that some sort of art quilting activities, interaction, and mutual support will continue to happen in this area whether it be formal (as in a guild or some such thing) or informal. They have nurtured enough fiber artists that there is a strong contingency of us in the area and most are enthusiastic about the medium enough to support something---we just aren't quite sure what yet!

I'd like to see us be able to bring in some national and regional level teachers, have local workshops and "play days", maybe retreats, and possibly continue having a show as In Good Company has done for the past five years.

I'm not sure how this will effect my productivity or my creative energy. I do have my art discussion group which I love, but I have enjoyed the varied levels, styles, and energy of the members of Tarts over the years. Hopefully I will continue to experiment with surface design and play with new and different techniques and products on my own using them to expand my knowledge and continue to have new ideas and work that is fresh and creative.

I will enjoy the next few months and savor the good things I get from Tarts and In Good Company. In July I will find out how well I can do on my own and see if I can keep motivated creatively every month without a new technique or design idea from Tarts to spur me on.

Thank you Jamie, Sue Anne, Susan and Sue for everything you have shared with us. You are inspiring, motivating, supportive, and set an example we are all proud to try to live up to. I hope you are all able to enjoy your freedom from the business end of things and create more art.

Create more art.

Monday, January 30, 2012

Goals for the New Year

Today I submitted two show entries so now I currently have 5 shows that I have submitted entries to and am waiting to hear about. I start getting very anxious a week before the stated notification date and start watching for mail or e-mail from the shows. I know that most of them wait until that date and sometimes even later, but I still am ever hopeful that a big fat envelope will show up in my mailbox a week early!

Keeping track of what pieces have been submitted to shows for jurying or have been accepted and are thus committed to shows is very complicated. I have to pay attention to the dates they want the pieces to be shipped to them and how long before they will be returned, as well as how long the jurying and notification process will take. Some shows have a quick 2-3 week turnaround (thank you Mancuso's!) and other shows take several agonizing months to let you know your fate. My husband is attempting to create a database for me that might help with some of the confusion of what is going where and when.

I have to say I really enjoy the process and that might be partly because I have a pretty good success rate of getting into shows. I haven't yet made it into any of the prestigious art quilt venues, but I keep trying and am ever hopeful. I have been in two AQS shows and as I mentioned last post will be sending one to AQS Lancaster this year. I've been in quilt and art quilt shows all around the country and one mixed media show. I have had very good luck regionally getting into galleries and selling my work. I guess if I had gotten more rejections I might not find the process so rewarding! I get anxious as the notification date gets close and then it distracts me from getting other things done. I'm waiting for one tomorrow and then one on Friday and it is definitely preoccupying my mind.

One thing I have learned is that you never know who might see your work in these various venues and what opportunities might arise from that. I sold a large piece as a result of having it in a show in Lowell, Massachusetts, and there is a magazine publisher who has noticed my work after having seen it in a machine quilting show and that has provided me with a recent opportunity.

My goal for the last three years has been to get my work out there and get a name for myself in the art/quilt world by entering shows and trying to win some awards. I have won several awards in major shows and have sent my work all over the country. I feel that I have been successful in this goal and this year I need to set a new direction for my efforts. I have not won a top award at a show yet and I have not had a quilt in Houston or Paducah (size matters here---they want larger pieces than I usually make!). I'd like to submit some articles to magazines and see if I can get published. I'd like to make enough money with my art to get myself a nice printer, a nice lighting set-up for photographing my work, and attend one of the shows where my work is being shown.

I have never been one to formally set goals, but after a few of years of having a pretty good clarity about what I wanted to do, now I feel like I need to redirect my efforts. Wish me luck!

Here are some more pictures of recent work:

"Nothing Lasts Forever" - Tan sections are made from layers of glue-fused tissue paper (Kleenex!) that is painted. I stitched the paper pieces to brown felt before layering them onto the quilt.


This next piece was in my September show at The Artist's Shop. It is not my favorite piece as I feel it is rather unsuccessful, but I had people tell me it was their favorite. One woman did not understand why the price on this piece was lower than on another that appeared to have taken much less work. That's because I tend to include the level of success and sale-ability (is that a word?) a piece has when I price it. Definitely a subject part of the pricing process, but I feel it is legitimate. This piece is called "Nature's Window". I just kept doing things to it to try to make it better and as a result it is overdone and not cohesive. Someone will like it (as I said, some do!), and it will be a bargain for them!

I showed the full view of this piece, "A Hoop That Never Ends", in a previous post, but I thought this detail showed the embellishments that make this piece interesting. The hand stitching on this piece took a great deal of time.

Now to get working on those goals!

Tuesday, January 24, 2012

Ornaments and New Works


I spent about a month before the holidays making small quilted and beaded artworks with hangers that I call “ornaments” but most of them are too large to actually hang on a Christmas tree. I layer fabric with heavyweight stablizer like Timtex and use a gluestick to secure them. I quilt them, satin stitch or couch yarn around the edges, then embellish them with beads, yarn, etc. They are rather time-consuming to create and I don't really make much on them for the materials and time put into them, but people do buy them and seem to enjoy hanging them year round. Some of them are still hanging in River's Mist Gallery in Stevensville and in The Artist's Shop in Missoula. The prices on them range from $22 to $30. Here are some more:


Here are a couple of pieces that I made this fall. The first one was a project using pearl cotton and embroidery floss to make buttonhole stitches around circular objects like washers, plastic loops, pony beads, and whatever else you might find. I suspended them from the top of the quilt and called it “A Hoop That Never Ends” which is from a song in the Disney movie, Pocahontas and I believe refers to the circle of life.

The piece below, "Fade to Dark", started with the ombre fabric that fades from light orange/red to almost black. I love the textures and lines of this piece and I feel that the quilting was rather successful. This piece really glows when it is hanging on the wall. It has been in two galleries and the lighting really made it stand out. There is quite a bit of stamping using Lumiere fabric paint and a stamp I made myself. The beads are mostly dyed bone, but there is also a stone donut in the top left corner with a cascade of fiber strands dangling from it. The red strips in the area of criss-cross strips is a faux suede. I used a double flange around the inside of the binding which I think is quite effective for the piece. I have been using a lot of flanges, which are actually just unfilled piping, around the edges of my pieces. They are easy to do and add another shot of color to the "frame".


I found out yesterday that my piece, “Tapestry Strutting”  (see my August 26, 2011 post for a picture) will be shown at the AQS Lancaster quilt show. They chose 202 quilts for the judged show and they have $44,000 in prize money. They are expecting at least 20,000 people so it is good exposure for my work. I was very happy to get that "fat" envelope in the mail. I thought it was somewhat of a risk to choose this piece because it is so different, but I think the color and the quilting are very effective. I have enjoyed living with it on my walls at home. Wish me luck---I'd love to get published in American Quilter magazine with all the winners again! [“Red Sky” won 3rd place at AQS Des Moines a couple of years ago so it was in the magazine]

Monday, November 7, 2011

Birthday Treats and Halloween Sewing

I made cake pops to take to my son's class for his 9th birthday. I had never made them before but we had tasted them and both liked them so I gave it a try. Rather messy mixing and shaping, but they turned out really cute. It is my own design. Some of the kids thought they were "angry birds" which I had never heard of so that isn't what they were intended to be. I told them they were "friendly" birds. The tail and beak are candy corns and the eyes were premade sugar candy eyes. The kids were almost afraid to eat them and some wanted to take them home to show their moms. They all ended up eating them though and they were very well liked.


Once again a costume was required for the now 9-year old son. My usual MO is to search the house for items that can be "adapted" instead of starting from scratch for a costume. This year I laid eyes on the long stuffed tube I had made for my son a number of years ago to wrap into a coil and sit in or lean against. I quickly stitched up a head and tail to stuff and attach to the ends of the already made stuffed tube. I put eyes and a forked tongue (maybe not truly python-like, but a hit with the 9-year old) on it and made a python. I attached the head part to an old adult size t-shirt so it would be positioned over his shoulder and I wouldn't have to pin it every time he put it on. We wrapped the body around him and strapped coils up by wrapping them with ties that went over his shoulders. I put a "safari" hat on him and a pair of toy binoculars and he was transformed into a National Geographic explorer having a bad day! The costume was a hit! It did require a number of gyrations for both of us to get it off and on him each time, but once he had it on there didn't seem to be any problems for him and actually in the trick-or-treating crowds it acted as a sort of bumper protecting him from harm!!

Although I spend a lot of time making sure my art pieces are well made and sturdy, when I make a costume I use large stitches and safety pins, and I don't worry much about raw edges and other imperfections. It is only for a couple of days of wear so for me comfort is the key requirement, not quality. A good idea creatively executed that the kid will wear without complaint is a success!
Here I am helping him put it on at his class party:


And here he is with the complete outfit:

We went to a neighborhood where there must have been hundreds of kids trick-or-treating because most of the houses decorate and prepare for the masses (although we were late getting started and many ran out before we got there and had their lights off already!). One house we went to told my son that his was the best costume she had seen all night and had to bring her son to the door to show him. He had lots of other comments about his costume which wasn't surprising since the crowds are full of ninjas and witches and other purchased costumes so anything homemade is unique. Another successful Halloween and a happy 9-year old trick-or-treater!

The Challenges and Triumphs of 2022

One thing I can say about 2022 is that it was not a dull year! We have all been enjoying a little more freedom and social interaction with l...